From opening to end of day.
Follow a step-by-step sale to see how easy it is to ring up customers, apply discounts, and complete a checkout from start to finish.
Open the POS
Log into the station with your staff passcode.

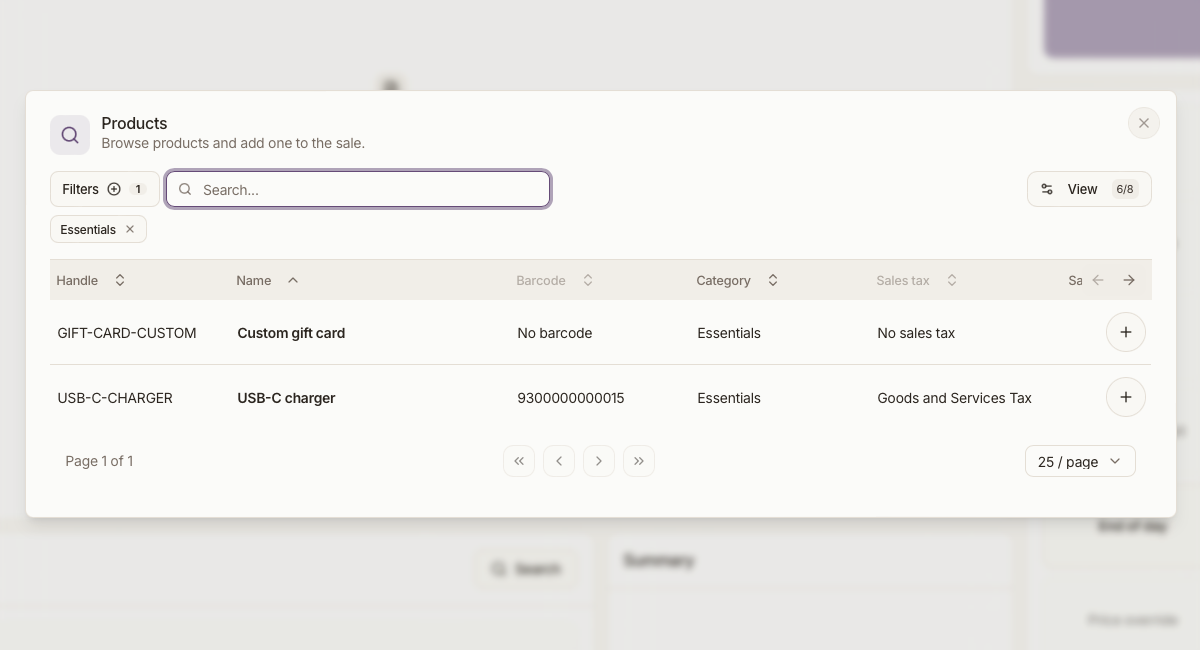
Add or Scan Products
Scan barcodes with your scanner, or enter the products handle. Use the search or tap items on the quick-lookup screen.
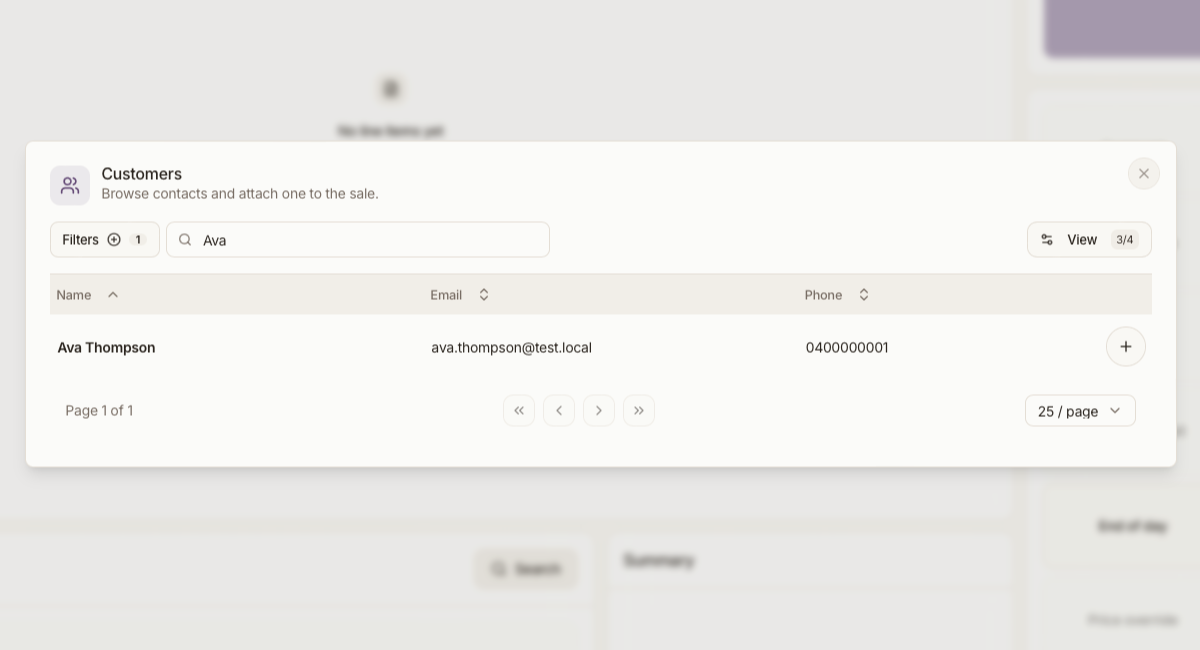
Load a Customer
Look up an existing customer by name or email, or quickly create a new customer.
Review Customer
Ensure you have added the correct customer, review the customers details and contact information.

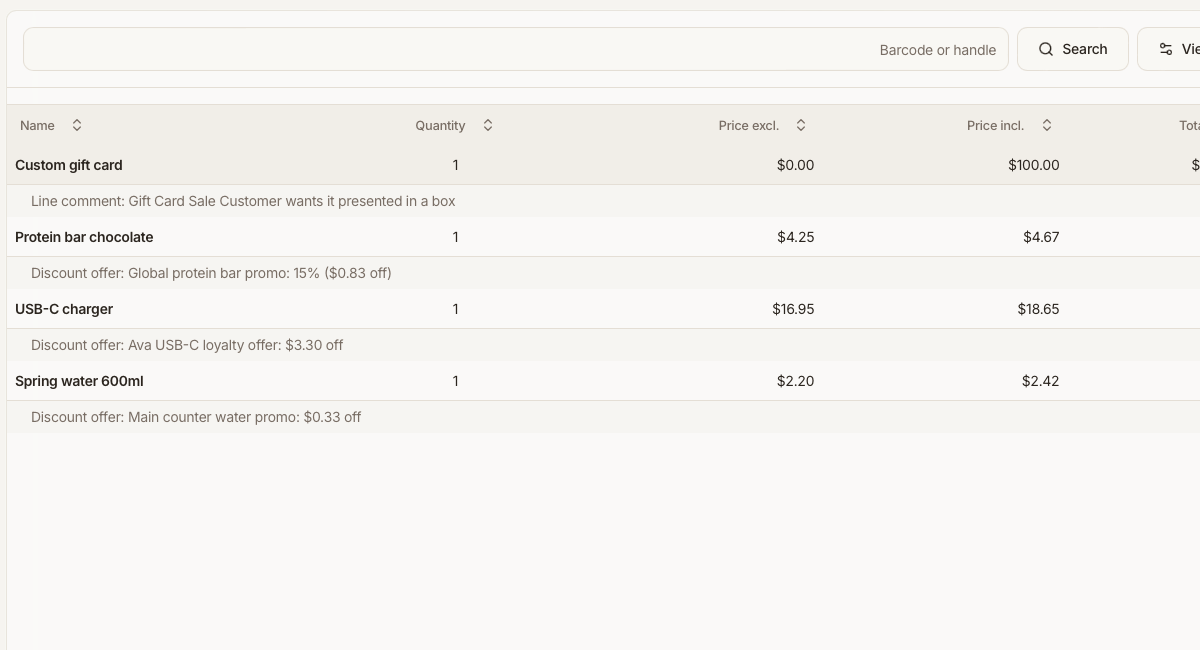
Add Details
Add any further comments, one off discounts, or adjust pricing and quantities.

Review Basket
Review the products, pricing and quantities before finalising the sale.
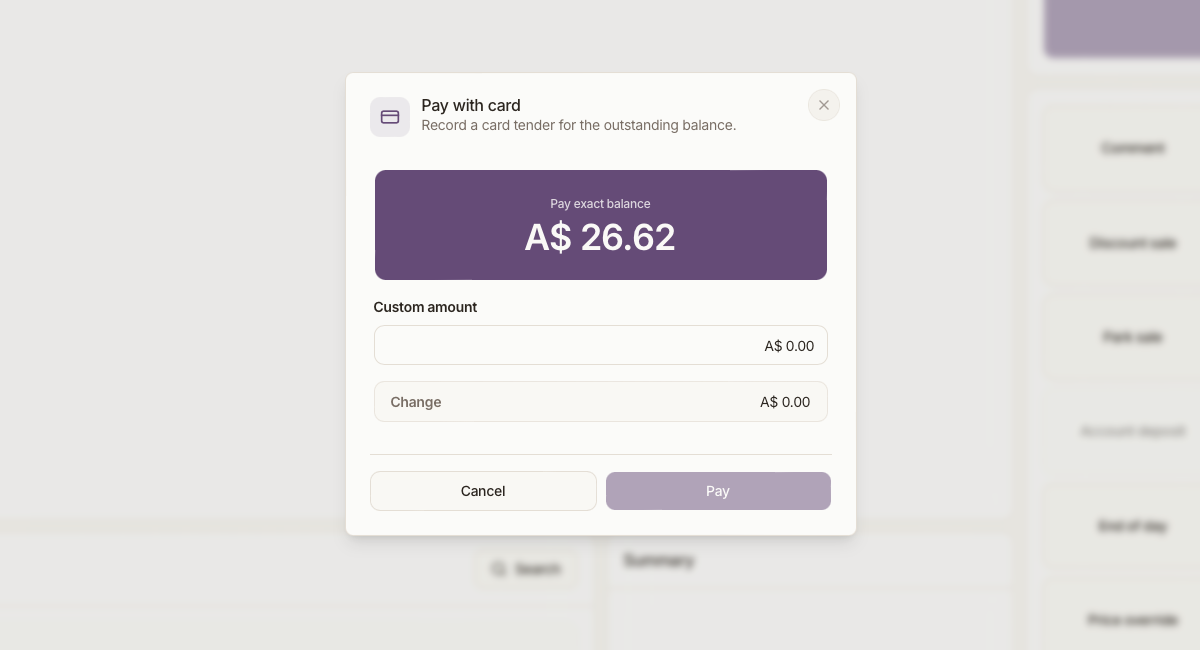
Take Payment
Send the total amount to your card terminal or process cash. You can easily split across multiple payments if needed.
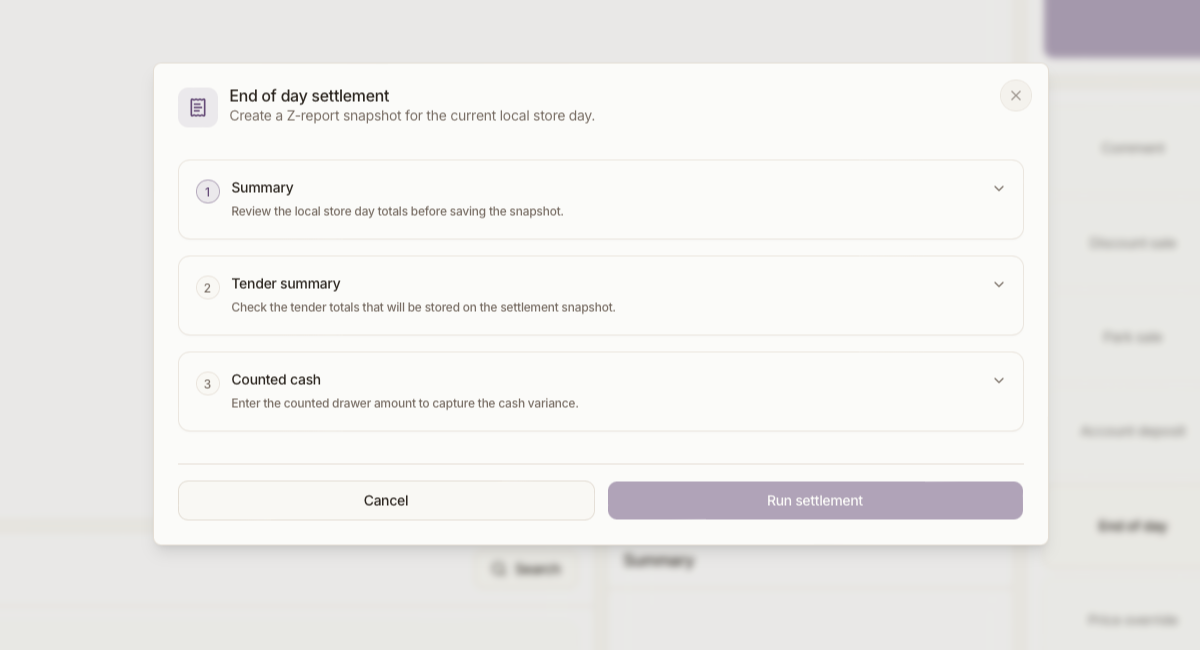
Run End of Day
At the end of the shift/day, count the cash and deliver your settlement report directly to your inbox.
Ready to move?
Join the waitlist for early access, launch updates, and migration conversations while the platform moves toward release.